Updated:
21-Feb-07
Build your own USB Audio Streaming Server
for Livingroom use....
After
building a USB DAC you might have need for it....
At least I had !
Introduction
and Installation
In the beginning (sounds like Genesis.... but I am not that guy...) I did the
testing with an old PC, I am using in my Hobby Basement. So I carried the whole
thing, including monitor into the living room and put the whole set up next to
the Audiorack. On a small table next to that again (one of those IKEA things) I
had the mouse and keyboard. And when finally listening, I was literarily blown
away by the fan in the PC..... Can you imagine me, sitting on my knees before
that table, trying to operate the mouse and keyboard, whilst looking to the left
at the screen ???? Believe me, for testing ok, but I promised my self that if whenever
I would have a PC setup, streaming audio to the USB DAC, it should COMPLY with
the following requirements !!!! :-)))
The "PC" should be small so I can put it in the rack or behind it
The "PC" should be fanless, so it is absolutely quiet
The screen should be relatively small, so I can put it on the rack
As "human interface" preferably by means of a touch screen, allowing for a mouse and keyboard to be out of the way (and sight)
No need for high performance, as the only application is running Foobar2000..... This also means low power consumption, so running from a 12V Battery :-)
No local disks (save space and power) and just a 2.5" USB harddisk, so I can rip the music in the comfort of my study and bring it over to Livingroom.
Mmmmmm, that kind of sounded like expensive or difficult to get.... So I started to search Ebay ! Amazing that almost regardless what you look for, you ALWAYS find something here :-) Indeed also this time. I found the following equipment, some new, some used, some as "left-over" and all very CHEAP !!
DT166 mini PC barebone using the AMD Geode 533MHz processor. Runs on 12V and uses only 5Watt. Has 4 USB ports....
Sharp 8" VGA LCD flatpanel with integrated touchscreen (USB connected) and remote control. Had 2 pixel errors, but I don't care. Price was more than OK....
A 4GB used 2,5" HD which slides into the DT166 and contains the Windows XP operating system and application software
A 80GB 2,5" HD and a slim USB case, making up my Music Reservoir.... good for keeping over 100 CD's at a time. More than I normally listen to at the same time.....
To get the thing working, I hooked up a USB keyboard and USB Mouse and an USB external CD-ROM drive (I have all those things at house...) Started the "PC" and hit F1. Now in the bios you can have the boot sequence to look for a USB Harddisk and the XP CD-Rom was starting immediately.... After a few hours all was installed to my satisfaction. One small problem needed to be solved; the graphics driver does not support below 600x800, so the screen looked terrible.... grrrr. So connected the DT166 (yes it has a network connection as well) to my Router and visited the website of the (German) distributor and good luck ! A support page was providing up to date drivers allowing a brilliant picture at 480x640 (VGA). Installed the touchscreen drivers and of we go ! With the pen, navigating around windows and Foobar200 is easy and with a few clicks you can play your songs !
Connected the USB DDDAC to the DT166 and as expected, everything was immediately recognized and Windows installed the drivers.... READY TO GO !!
Here you find the website from the Manufacturer of the DT166 mini PC
And here is a PDF Document with the Specifications of the DT166
The
"Set-Up"
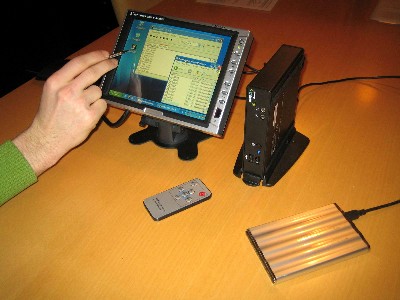
The pictures shows the very simple setup with the micro PC, the Touch Screen and
the 80Gbyte USB Hard drive..... The images tells it all.....
Above:
This is ALL !!! No noise, no heat, very little power dissipation, no keyboard,
no mouse :-))
Even a remote control.....
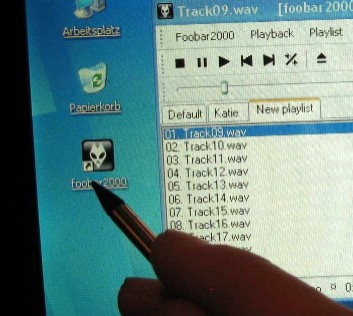
Above: Small detail image from the only application which should run on this PC, Foobar2000....
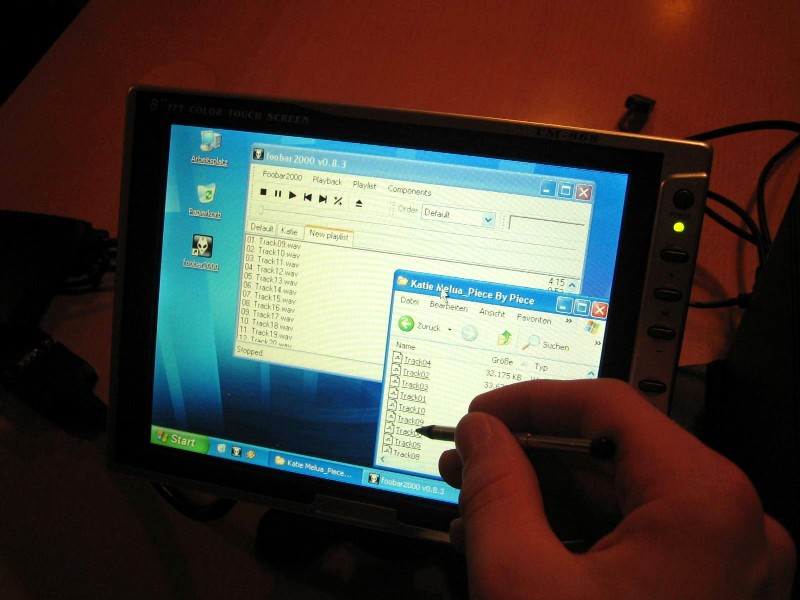
Above: On the USB Drive I have the ripped audio CDs, through the windows browser, I just pick the Album title and click, there we play ....

Above:
Detailed overview of the whole set .....
Thanks to the 4 USB ports, this system is very flexible, could have more drives
or other peripherals....
Results
All works great and this is a pleasure for the eye AND the ear, when integrated
in the Audiorack................
It took me only one evening to set up the whole thing. I thought it would be more difficult, but this was one of those things, you stay enthusiastic !
Happy Building and listening !!
Doede Douma
IMPORTANT: The information provided on this page is intended as guide for DIY activities and therefore free to copy and or publish. If any one wishes to use any of the information from my WEB site, please make sure to refer and footnote to my URL Link as source! Doede Douma