
Updated:
08-Dez-06
Introduction
After long thinking, I came to the conclusion, it would be best to actually copy the enclosure from the existing HGP. By doing so, I would be able to use the speaker stand. The active part of the HGP's, the active low range speakers are absolutely needed, as the Etamsas itself will slowly roll of below 170 Hz. Not by means of an inductor in the filter, but by the volume of the enclosure. Therefore I need the whole thing and I must admit, they look very nice, so why get rid of them ?? As I do not need the entire internal volume of the HGP design, the box was divided into several segments, which has the advantage of giving extra stiffness to the box. The empty "chambers" will be filled with sand to make sure they will not contribute to sound reproduction and give some extra weight to the whole. For the construction 19mm MDF is used. Later on, this will be sprayed satin Black to come as close as possible, matching the rest. Well, no real rocket science eh? Although it might sound dull, this part is what I like the most, just sawing, sanding, drilling etc etc etc. As pictures can tell much more than a lot of words, just have a look ---->
Project description
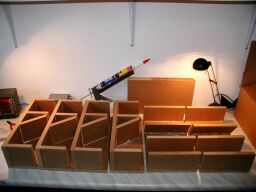
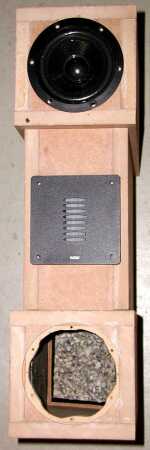
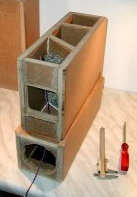
From the pictures below you can see that the final construction is built up from 3 modules per box. The modules for the top and bottom contains the LMS and the filter compartment. The module which connects the two, is the enclosure for the ER4. To avoid reflections straight back to the speaker cone, the back panel is placed under an angle in such a way, that a pulse will run dead before it can come back to the membrane. To support this, damping material was added at that spot. The rest of the chamber will be filled later on with wool...
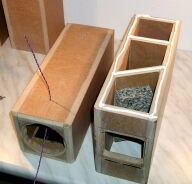
Here you will get a good idea how the module for the LMS is set up. At the right, all the 6 modules have been glued and are waiting for the sawing, drilling etc.
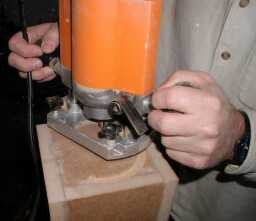
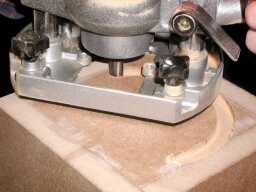
Ofcourse we want the chassis to fall back into the baffle. Not only because it looks so professional, but also to reduce diffraction of the sound at the edges !!
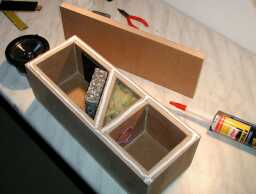
 Just a pre look on how the boy would look like, not glued yet...
 This stage shows the final assembly of the modules
into one box. The rounding of the edges and the sanding of surface has been done already
This stage shows the final assembly of the modules
into one box. The rounding of the edges and the sanding of surface has been done already
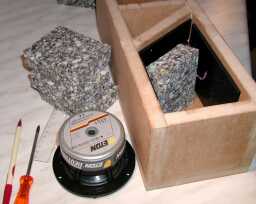
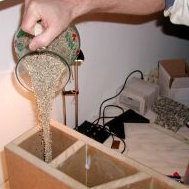
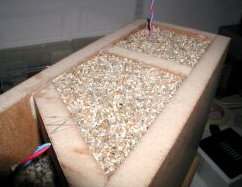
Now the empty chambers can be filled with sand..........
 Ready
for the top module to be glued on top here....... The wiring you see is pure Silver
(ofcourse.........)
Ready
for the top module to be glued on top here....... The wiring you see is pure Silver
(ofcourse.........)
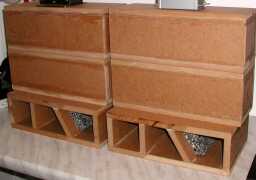
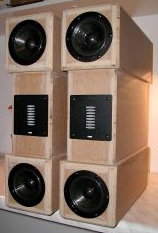
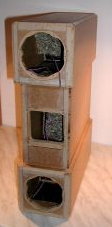 The complete box...... next step is to to mount the speaker chassis
and than........ testing and tweaking !!!!! finally !!!
The complete box...... next step is to to mount the speaker chassis
and than........ testing and tweaking !!!!! finally !!!

Happy Listening and Building !!!!
Doede Douma
IMPORTANT: The information provided on this page is intended as guide for DIY activities and therefore free to copy and or publish. If any one wishes to use any of the information from my WEB site, please make sure to refer and footnote to my URL Link as source! Doede Douma